Inspiring Walks: Bradford Millenium Way
- Gemma Bailey
- Apr 2, 2022
- 4 min read

Updated: Jun 21, 2023
A circular walk of approximately 45 miles which takes around 20 hours to complete on a route which covers woodland, farmland and moorland. What more could you ask for?
Best spots to get creative:
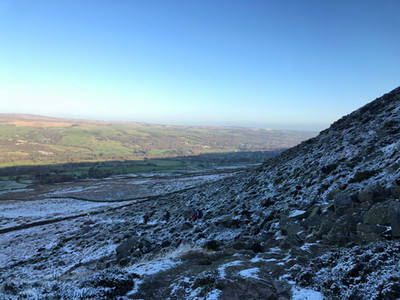
Top of Addingham moor, looking across towards Beamsley Beacon
Cow & Calf rocks
Shipley Glen
Goit Stock waterfall
Bronte waterfalls
I walked the Bradford Millenium Way across four days in January. Originally created to commemorate the 2000 Millennium year, the official start is at Bracken Hall on Baildon Moor, but I began the walk just outside of Silsden, at Silsden Gate. The route cuts through the golf course and follows a steady uphill trail through a number of farms up on to Silsden Moor. Descending into the village of Addingham, I enjoyed blue skies, and apart from losing my way around some of the farm buildings, all was going well. However, the first day soon became the hardest part of the entire walk for me, in part because it had snowed the night before! Although the sun was shining bright through the morning, by the time I reached Addingham, the shaded hillside of Addingham Moor was completely covered in icy snow which made the steep climb difficult. Finally, after a short scramble near the top, I emerged onto a beautifully snow-covered Ilkley Moor and a perfect view of Beamsley Beacon. As it was too cold to stop here and paint, I took some photographs to sketch later. A long walk from here traversing the moor leads to White Wells, a spa bath built in the early 1700s. I ended my first day here and headed home for some much needed warm food and rest!


Around a week later I set out again, walking three miles to White Wells to pick up where I left off. Unfortunately this meant starting my day with an uphill climb through Rocky Valley! This is a beautiful place to sketch however, with steep sides covered in crags and large fallen rocks, emerging to moorland overlooking the Cow and Calf rocks. The Cow & Calf rocks are a large rock formation with one large rock and a smaller one close by, like a cow and it’s calf. There is a local legend that the rocks were split when the giant Rombald stamped on the rock as he ran across the landscape escaping his angry wife.

After painting at this spot for quite a while, I continued my long walk around the side of the moorland with amazing views of Burley in Wharfedale and passing through grouse butts where I was accosted by many little grouse chirping at me as I explored their habitat. This entertaining chorus of grouse chirps kept me company for the next hour as I climbed up over Burley Moor. I then descended across the sparse moorland towards Baildon Moor, passing Weecher reservoir. I stopped to take in the official Millennium Way stone on Baildon Moor before descending through Shipley Glen and into Bingley to end my walk for the day.


The third section of my walk occurred a week later and began on the Leeds Liverpool Canal, about 15 minutes walk down from the famous Five Rise Locks. Crossing the Seven Arches Aquaduct, along the River Aire, the route cuts through Shipley Golf Club and into Ruin Bank Wood. The woodland here is dense and magical and a short detour will lead you to St David's Ruin, a folly built in 1796 as a viewpoint overlooking the Harden Beck valley. Back on the route, the Millennium Way signs lead down into Goit Stock Wood, which after a short walk, emerges into the peaceful and inspiring Goit Stock waterfall. In the right conditions this can also be a fantastic place to wild swim but beware of the cold!